Showing posts with label JPanel. Show all posts

Monday, August 9, 2010

Java Video Game Programming: Game Logic

The simple video game kernel I presented earlier is a good start, but some compromises were made to make it as simple as possible. Now we're going to start adding back some of the complexity to give us more control over what we can do with it.

The first step is to make the game's ball a real object, rather than some variables within our JFrame.

In simple video games, there is usually some object in the game that does most of the "thinking" with respect to the game's rules. In a game like Pong or Breakout, the ball does most of the "thinking". The paddles move according to user input, but they don't really need to know if they've collided with anything in the game (their own logic keeps them from moving off the playfield.) The bricks don't need to know anything about what's going on, they just need to hang around, then disappear when something tells them to, and perhaps return some information about what score they're worth, if there are different scores for hitting different bricks.

The ball, however, is a more active participant in the game. It needs to know about collisions, respond to the other objects in the game, and generally know what's going on. In other words, it is the object that keeps track of most of the game rules. In a video game, this is referred to as the game logic.


A bouncing ball in the simple Java video game kernel program.

This simple kernel improves on the original. Turn it into your own Pong, Breakout, or Tank clone.

In the example below I've made a Ball class. This is where most of the game's logic will reside. Here it is in the ball's move() method. Since the ball will need access to inside information about the playfield and the objects on it, I've made it an inner class of the playfield's class (VGKernel.) As an inner class, it has access to all of VGKernel's members and methods as if it owned them itself. This simplifies the program a lot.

Here is the modified version of the video game kernel. Changes from the original have been highlighted:
/* A simple video game style kernel, revision 2.
   by Mark Graybill, August 2010
   Uses an inner class to contain game logic,
   with another inner class as a game timer.
*/

// Import Timer and other useful stuff:
import java.util.*;
// Import the basic graphics classes.
import java.awt.*;
import javax.swing.*;
import java.lang.Math;

public class VGKernel extends JPanel{

// This is not a recommended coding practice, just a shortcut.
public Rectangle screen, bounds; // The screen area and boundary.
public JFrame frame; // A JFrame to put the graphics into.
public VGTimerTask vgTask; // The TimerTask that runs the game.
public VGBall ball; // The game ball.
// Create a constructor method:
  public VGKernel(){
    super();
    screen = new Rectangle(0, 0, 600, 400);
    bounds = new Rectangle(0, 0, 600, 400); // Give some temporary values.
    ball = new VGBall();
    frame = new JFrame("VGKernel");
    vgTask = new VGTimerTask();
}

  // Create an inner TimerTask class that has access to the
  // members of the VGKernel.
  class VGTimerTask extends TimerTask{
    public void run(){
      ball.move();
      frame.repaint();
    }
  }

  // Create an inner VGBall class that has our game logic in it.
  class VGBall{
    // Accessor methods would be more proper,
    // but for now I just make the needed variables public.
    public int x, y, width, height; // Ball's location and size.
    int xVel, yVel; // The ball's velocity.

    public VGBall(){
      x = 0;
      y = 0;
      width = 20;
      height = 20;
      xVel = width/4;
      yVel = height/4;
    }
    // Instance methods for VGBall
    public void move(){
      // Move the ball according to the game rules.
      x+=xVel; // Move horizontally.
      y+=yVel; // Move vertically.
      // Detect edges and bounce if necessary.
      if (x > (bounds.width - width)){
        xVel = -xVel; // reverse movement.
        x = bounds.width -  width; // Set location to screen edge.
      }
      if (y > (bounds.height - height)){
        yVel = -yVel; // reverse movement.
        y = bounds.height - height;
      }
      if (x <= 0) { xVel = -xVel; x = 0; }
      if (y <= 0) { yVel = -yVel; y = 0; }
    }
  } // end of class VGBall

// Now the instance methods:
  public void paintComponent(Graphics g){
    // Get the drawing area bounds for game logic.
    bounds = g.getClipBounds();
    // Clear the drawing area, then draw the ball.
    g.clearRect(screen.x, screen.y, screen.width, screen.height);
    g.fillRect(ball.x, ball.y, ball.width, ball.height);
  }

  public static void main(String arg[]){

    java.util.Timer vgTimer = new java.util.Timer();  // Create a Timer object
    VGKernel panel = new VGKernel(); 
    
    panel.frame.setDefaultCloseOperation(JFrame.EXIT_ON_CLOSE);
    panel.frame.setSize(panel.screen.width, panel.screen.height);

    panel.frame.setContentPane(panel); 
    panel.frame.setVisible(true);

    // Set up a timer to do the vgTask regularly.
    vgTimer.schedule(panel.vgTask, 0, 33);
  }
}
Now the ball not only is its own class, it has a more sophisticated means of keeping track of its direction of movement (xVel and yVel, tracking velocity as a positive or negative value, as opposed to the simple right and down booleans in the original.) This means that logic in the game could vary the velocity of the ball easily, as well as change its direction of movement.

Other objects on the playfield should be defined in their own classes, outside VGKernel. This will keep VGKernel from becoming too long and from making the program too monolithic and difficult to maintain.

Simple exercises:
Since the ball has access to VGKernel's members, including the drawing screen, the ball can be made to draw itself. By giving the ball its own draw() method, we can make it easier to change the appearance of the ball at will. Give it a try.
StumbleUpon

Wednesday, August 4, 2010

A Simple Java Video Game Kernel

Most video games run continuously, rather than waiting for user input before they do something. The heart of a video game of this sort is called the kernel. The kernel is running in the background, collecting user input and updating the display. It uses logic to determine if the game has been won or lost or otherwise control the state of the game.


A bouncing ball in the simple Java video game kernel program.
This simple kernel sends a ball bouncing around on the screen. Turn it into your own Pong, Breakout, or Tank clone.

To run this way, Threads are usually used to allow more than one thing to be going on at a time in a Java program. We've looked at a simple way of using threads before, the Timer class.

Here's a really, really simple video game kernel. It has all the basic elements of a video game.
/* A simple video game style kernel
   by Mark Graybill, August 2010
   Uses the Timer Class to move a ball on a playfield.
*/

// Import Timer and other useful stuff:
import java.util.*;
// Import the basic graphics classes.
import java.awt.*;
import javax.swing.*;

public class VGKernel extends JPanel{

// Set up the objects and variables we'll want.
public Rectangle screen, ball; // The screen area and ball location/size.
public Rectangle bounds;  // The boundaries of the drawing area.
public JFrame frame; // A JFrame to put the graphics into.
public VGTimerTask vgTask; // The TimerTask that runs the game.
public boolean down, right; // Direction of ball's travel.

// Create a constructor method that initializes things:
  public VGKernel(){
    super();
    screen = new Rectangle(0, 0, 600, 400);
    ball   = new Rectangle(0, 0, 20, 20);
    bounds = new Rectangle(0, 0, 600, 400); // Give some starter values.
    frame = new JFrame("VGKernel");
    vgTask = new VGTimerTask();
}
  // Create an inner TimerTask class that has access to the
  // members of the VGKernel.
  class VGTimerTask extends TimerTask{
    public void run(){
      moveBall();
      frame.repaint();
    }
  }

// Now the instance methods:
  public void paintComponent(Graphics g){
    // Get the drawing area bounds for game logic.
    bounds = g.getClipBounds();
    // Clear the drawing area, then draw the ball.
    g.clearRect(screen.x, screen.y, screen.width, screen.height);
    g.fillRect(ball.x, ball.y, ball.width, ball.height);
  }

  public void moveBall(){
  // Ball should really be its own class with this as a method.
    if (right) ball.x+=ball.width; // If right is true, move ball right,
    else ball.x-=ball.width;       // otherwise move left.
    if (down)  ball.y+=ball.height; // Same for up/down.
    else ball.y-=ball.width;
    if (ball.x > (bounds.width - ball.width)) // Detect edges and bounce.
      { right = false; ball.x = bounds.width -  ball.width; }
    if (ball.y > (bounds.height - ball.height))
      { down  = false; ball.y = bounds.height - ball.height;}
    if (ball.x <= 0) { right = true; ball.x = 0; }
    if (ball.y <= 0) { down  = true; ball.y = 0; }
  }

  public static void main(String arg[]){
    java.util.Timer vgTimer = new java.util.Timer();  // Create a Timer.
    VGKernel panel = new VGKernel(); // Create and instance of our kernel.
    
    // Set the intial ball movement direction.
    panel.down = true;
    panel.right = true;

    // Set up our JFRame
    panel.frame.setDefaultCloseOperation(JFrame.EXIT_ON_CLOSE);
    panel.frame.setSize(panel.screen.width, panel.screen.height);
    panel.frame.setContentPane(panel); 
    panel.frame.setVisible(true);

    // Set up a timer to do the vgTask regularly.
    vgTimer.schedule(panel.vgTask, 0, 100);
  }
}

This example can be expanded with methods to get control inputs, additional players on the playfield (like paddles), and logic to determine when someone scores.

The code here is far from perfect, but I've made some compromises to make things as simple as I could while still showing a full working example. Not that any code that runs and does what is supposed to is really bad, but there are other, better ways of doing this. But this works and is fairly easy to understand.

What the program does is create a JPanel that has an inner class (a class defined within itself) of VGTimerTask. The VGTimerTask is a kind of TimerTask, which can be scheduled to occur on a regular basis by a Timer. Since VGTimerTask is an inner class of VGPanel, it has access to all the members of VGPanel. This is critical. Without that, it wouldn't be able to access the ball and redraw the screen easily (it can still be done, but in a more complex way.)

Timer is a decent way of running a simple game, but more complex games should use some other timing mechanism. java.util.Timer is affected by a number of outside events, so to get smoother, more reliable timing you a timer like the one in the Java3D package would work better.

A Simple Improvement

There are many ways of improving on this basic example. One way that is very simple is to smooth the animation. The movement of the ball is pretty jerky. This is caused by both the distance that the ball moves each "turn", and by the time between screen updates. We can smooth out the animation by addressing both of these.

First, let's change moveBall() to shift the ball a smaller distance each time:
public void moveBall(){
  // Ball should really be its own class with this as a method.
    if (right) ball.x+=ball.width/4; // If right is true, move ball right,
    else ball.x-=ball.width/4;       // otherwise move left.
    if (down)  ball.y+=ball.height/4; // Same for up/down.
    else ball.y-=ball.width/4;
    if (ball.x > (bounds.width - ball.width)) // Detect edges and bounce.
      { right = false; ball.x = bounds.width -  ball.width; }
    if (ball.y > (bounds.height - ball.height))
      { down  = false; ball.y = bounds.height - ball.height;}
    if (ball.x <= 0) { right = true; ball.x = 0; }
    if (ball.y <= 0) { down  = true; ball.y = 0; }
  }
Now the ball is being moved only one quarter of its size each turn.

Next, change the Timer schedule to draw the screen every 20 milliseconds instead of every 100 milliseconds:
// Set up a timer to do the vgTask regularly.
    vgTimer.schedule(panel.vgTask, 0, 20);

Now you have a ball that moves a lot smoother.

I'll be expanding on this basic kernel and improving it in future articles, starting with Java Video game Programming: Game Logic
StumbleUpon

Monday, January 26, 2009

Loading and Displaying an Image in Java

Here's a common task--loading an image file and displaying it in a window.

I'll be using this program as a basis for further two dimensional graphics exercises, so give it a try and play around with it.

First, we need to get a picture to use. I use a picture of Duke, the Java mascot, from https://duke.dev.java.net/images/web/Duke_Blocks.gif

If you want to run the program as I present it, download the image and save it into the same directory that yor java program will be in. If you want to use your own image, replace the file name Duke_Blocks.gif with the name of your image file, and make sure the image is in the same directory as your java program.

The only somewhat tricky part is that we're using a Toolkit method to get the image. Take a look at the Java API reference to learn more about the Toolkit. (The Toolkit object is part of the java.awt package. So select "java.awt" in the top left frame of the API reference webpage to make finding Toolkit in the lower left frame easier.)

In this program, we scale and position the image in our window. In future programs, we'll convert the image to a Java2D object (which is really easy) so that we can do other things, like rotate it and use it as a sprite.

Here's the program:
/* ShowImage.java

  This program loads and displays an image from a file.

  mag-13May2008
  updated 20Feb2009 by mag to incorporate suggestions
  by mazing and iofthestorm on digg.
*/

// Import the basic graphics classes.
import java.awt.*;
import javax.swing.*;

public class ShowImage extends JPanel{
  Image image; // Declare a name for our Image object.

// Create a constructor method
  public ShowImage(){
   super();
   // Load an image file into our Image object.
   // This file has to be in the same
   // directory as ShowImage.class.
   image = Toolkit.getDefaultToolkit().getImage("Duke_Blocks.gif");
  }

// The following methods are instance methods.

/* Create a paintComponent() method to override the one in
JPanel.
This is where the drawing happens.
We don't have to call it in our program, it gets called
automatically whenever the panel needs to be redrawn,
like when it it made visible or moved or whatever.
*/
  public void paintComponent(Graphics g){

   // Draw our Image object.
   g.drawImage(image,50,10,200,200, this); // at location 50,10
     // 200 wide and high
  }

  public static void main(String arg[]){
   JFrame frame = new JFrame("ShowImage");
   frame.setDefaultCloseOperation(JFrame.EXIT_ON_CLOSE);
   frame.setSize(600,400);

   ShowImage panel = new ShowImage();
   frame.setContentPane(panel);
   frame.setVisible(true);
  }
}
StumbleUpon

Sunday, July 20, 2008

Controlling Java's Graphics: paintComponent() and repaint()

Why do we put all our graphical drawing code into a paintComponent() method? It seems odd, since it would seem we should be able to simply stick some simple graphics commands into our main() method in a Java application and just get the drawing done. Where does paintComponent come from? If we never call it in our code, how does it get executed?

It seems like magic, doesn't it? You just sort of set it up and somehow it happens. Hopefully when and how we want it to. It seems like a vaguely disquieting form of magic, perhaps.

When Java does graphics, suddenly you're not in the strict control of the program that you are with command line applications. With graphics, your program is now interacting with the other parts of your computer's operating system. It's not just running in its own little corner of the machine. Now it's got a window out on that shared resource, the display, and the window has to interact properly with everything else that's on the display.

Think of it this way, if you are just driving around on private property all by yourself you don't have to worry about traffic. Off on your own stretch of road, with an unused parking lot or two to tool around in, you don't have to worry about sharing. You can cross the center line, pull on and off the road without signalling, you don't even need a license so long as you don't go on a public road.

But once you head for the public roads and freeway, you've got to share. The rules matter. It gets more complicated than buzzing around in a go-cart or whatever on private property. And things happen that you don't have any direct control over, like red lights and merging traffic.

When you move your program on to the display in Java, you don't have to do everything on your own as you would have to in a car. Java's graphics system takes care of a lot for you. Unfortunately this means your code starts looking like magic. Methods get called without you doing the calling. But it's OK. All you need to know is what to expect.

The paintComponent() method redraws your graphics area. In our examples so far this has been a JPanel. There are two ways paintComponent() can get called. One is automatic, the other is up to you.

The automatic way is what we've used so far. The computer's window manager automatically calls for your program to redraw its graphics whenever a window it owns appears to need redrawing. The window manager can decide this for any of a number of reasons. Such as when the window initially appears on screen. Or if the window has been covered up in part or in whole by another window on screen, and the covered part has just been uncovered. Maybe the window had been minimized, and has just been restored.

When these sort of things happen, the Java Runtime Environment calls the paint() method for your container. In our examples so far, our container has been a JFrame. It will be a "heavyweight" component (see the JFrames article for a brief discussion on this.) Once the container redraws itself, it'll pass the command down to its children, that is, the lightweight components that live inside it. A lightweight component from the Swing package uses the paintComponent() method to redraw itself. So that's what gets called. Shazam! It's like magic!

This means you want to set up paintComponent() to draw things the way you want them when it gets called. If you're doing drawings that don't change, like the examples we've done to date, then you don't need to look up any information. If you're doing anything animated or that otherwise changes over time, you need to have paintComponent() be able to look things up at the time of drawing to properly reflect conditions in the drawing.

Now, let's say you've changed something in your program and you want to redraw to show the change. You probably don't want to wait until the window manager thinks your window needs redrawing. If nobody is changing things on the screen otherwise, it may not redraw until way too late!

Does that mean you put a call to paintComponent() in your program? No! You would be taking a chance of breaking something if you did. You want to start from the top, like the Java Runtime Environment did. In your case, you want to call repaint(). This will take things from the top. It also handles some possibilities that jumping in and calling paintComponent() on your own will not.

Like, let's say both you and the window manager decide to redraw at the same time. If you bypass repaint() you'll be slowing down your program by making it repaint twice when it really only needs to redraw once. When you call repaint(), Java catches this for you and saves you some computer time by only redrawing once. It'll also catch redraw requests made while the redrawing is going on and deal with them appropriately. Your paintComponent() method will get called in its own turn when you use repaint().

So, if you have new information you want depicted on screen, use repaint().

Put all your drawing inside paintComponent() and let the system take care of knowing when to call it otherwise. Give paintComponent() the ability to get the information it needs to draw things the way you want them now. If you're getting ahead of what I've written here, and aren't sure how to get through the Object Oriented barriers, look up "inner classes" for a start. It gives you a way to get the information where you need it when you need it.
StumbleUpon

Saturday, July 19, 2008

Very Basic Java Graphics: 3 Examples

We're going to build up a graphics app from something so basic it doesn't really work, like the example from Java Graphics--Start with a JFrame and building to something more sophisticated. In the JFrame article and in A Most Basic Graphics App I've avoided the use of comments in the code to keep it shorter. In these examples I'm going to include comments in the code to describe what's happening. So don't be scared of the length of these examples, most of what's there is just comments, which Java ignores. They're there just for humans.
/* BasicFrame.java

This is a really simple graphics program.
It opens a frame on the screen with a single
line drawn across it.

It's not very polished, but it demonstrates
a graphical program as simply as possible.mag-27Apr2008
*/

// Import the basic graphics classes.
import java.awt.*;
import javax.swing.*;

public class BasicFrame extends JFrame{

// Create a constructor method
public BasicFrame(){
// All we do is call JFrame's constructor.
// We don't need anything special for this
// program.
super();
}

// The following methods are instance methods.
/* Create a paint() method to override the one in JFrame.
This is where the drawing happens.
We don't have to call it in our program, it gets called
automatically whenever the frame needs to be redrawn,
like when it it made visible or moved or whatever.*/
public void paint(Graphics g){
g.drawLine(10,10,150,150); // Draw a line from (10,10) to (150,150)
}

public static void main(String arg[]){
// create an identifier named 'window' and
// apply it to a new BasicFrame object
// created using our constructor, above.
BasicFrame frame = new BasicFrame();

// Use the setSize method that our BasicFrame
// object inherited to make the frame
// 200 pixels wide and high.
frame.setSize(200,200);

// Make the window show on the screen.
frame.setVisible(true);
}
}

This example draws a line on the JFrame. The window decorations take up some of our drawing space, so the title bar may cover some of our line. With some JVMs the background area of the JFrame won't be cleared before you draw. Also, when you close the window using the close button, the application doesn't shut down. For many applications on Mac OS X this is normal behavior, but on other OSes, and even many applications under OS X it's normal to expect an application to close down completely if you click the close button on the last open window (for applications that have multiple windows) or the close button on the main window for other applications.

So here's our next example, where we take care of that last problem:
/* CloseFrame.java
This is a really simple graphics program.
It opens a frame on the screen with a single
line drawn across it.

We're starting to add a little bit of polish
here--we make the program close nicely when
the close box is clicked, rather than just
sort of hanging around half-dead.
mag-28Apr2008
*/

// Import the basic graphics classes.
import java.awt.*;
import javax.swing.*;

public class CloseFrame extends JFrame{

// Create a constructor method
public CloseFrame(){
// All we do is call JFrame's constructor.
// We don't need anything special for this.
super();
}

// The following methods are instance methods.

/* Create a paint() method to override the one in JFrame.
This is where the drawing happens.
We don't have to call it in our program,
it gets called automatically whenever the
frame needs to be redrawn, like when it is
made visible or moved or whatever.
*/
public void paint(Graphics g){
g.drawLine(10,10,150,150); // Draw a line from (10,10) to (150,150)
}

public static void main(String arg[]){
BasicFrame frame = new BasicFrame();
// This uses a constant EXIT_ON_CLOSE that's a member of JFrame.
// The constant is passed to the setDefaultCloseOperation method
// of our frame object, which is a CloseFrame object,
// which inherits the method from its parent JFrame.
// It makes the program exit (close completely) when we click
// the close button.
frame.setDefaultCloseOperation(JFrame.EXIT_ON_CLOSE);
frame.setSize(200,200);frame.setVisible(true);
}
}

The magic line that makes the application exit when we click the close button is the one that reads: frame.setDefaultCloseOperation(JFrame.EXIT_ON_CLOSE);. We can tell that EXIT_ON_CLOSE is a type of variable called a "constant" because the name follows the convention of being written in all capital letters. So we're not YELLING when we say "EXIT_ON_CLOSE" we're using the value stored in EXIT_ON_CLOSE as part of the JFrame class.
A JFrame has this constant available because it implements the interface WindowConstants. By implementing this interface, in essence, the JFrame class of objects promise to do the right thing if one of these constants is passed to a method that handles it, in this case setDefaultCloseOperation.

Our final example for this entry goes one big step further:
/* BasicJPanel.java
This is a somewhat more sophisticated drawing program.
It uses a new child of JPanel as the drawing surface
for a JFrame, to avoid the problems with drawing
directly on a JFrame.

A custom JPanel child class called BasicJPanel is created
with its own paintComponent method, which contains our
drawing code.

A generic JFrame is then created to hold the BasicJPanel
object, the BasicJPanel is created, made into the JPanel's
content pane, and our paintComponent method is called
automatically. *Whew!*
mag-28Apr2008
*/

// Import the basic graphics classes.
import java.awt.*;
import javax.swing.*;

public class BasicJPanel extends JPanel{

// Create a constructor method
public BasicJPanel(){
super();
}

// The following methods are instance methods.

/* Create a paintComponent() method to override the one in
JPanel.This is where the drawing happens. We don't have
to call it in our program, it gets called automatically
whenever the panel needs to be redrawn, like when it is
made visible or moved or whatever.
*/
public void paintComponent(Graphics g){
g.drawLine(10,10,150,150); // Draw a line from (10,10) to (150,150)
}

public static void main(String arg[]){
JFrame frame = new JFrame("BasicJPanel");
frame.setDefaultCloseOperation(JFrame.EXIT_ON_CLOSE);
frame.setSize(200,200);

// Create a new identifier for a BasicJPanel called "panel",
// then create a new BasicJPanel object for it to refer to.
BasicJPanel panel = new BasicJPanel();

// Make the panel object the content pane of the JFrame.
// This puts it into the drawable area of frame, and now
// we do all our drawing to panel, using paintComponent(), above.
frame.setContentPane(panel);
frame.setVisible(true);
}
}

Here, we've added a JPanel inside the drawable area of our JFrame. This means that if we start drawing at 0,0 we'll actually be drawing somewhere we can see it, it won't be hidden by the window decorations.

The other big change is the change of our drawing method's name from paint() to paintComponent(). This is because we changed from a JFrame to a JPanel. If you take a look at JPanel in the API Specification you'll see that it extends JComponent. This family of objects uses paintComponent() to manage drawing.

This last example is a good starting point for any graphical operation. In future examples, I'll be extending it further to add additional features.
StumbleUpon

Tuesday, July 15, 2008

Drawing Lines

In A Most Basic Graphics App we had the framework of a simple graphics application. We trimmed it down a little, too much really, in Start With a JFrame. The JFrame alone doesn't accomodate graphics as well as we would like. The "window decorations"--the title bar, the frame around the window, close button and so on--all cover part of our drawing area. Likewise, there are other problems that crop up on different JVMs.

So we'll use the BasicPanel.java program from A Most Basic Graphics App to build on now.

We're going to concern ourselves with the part of the program that does the actual drawing:
g.drawLine(10,10,150,150); // Draw a line from (10,10) to (150,150)

In particular, we're going to focus on those four numbers inside the parentheses. What are they? Where do they come from? How can we pick numbers that will let us draw what we want, and what are the limits on what we can put in there?

First, let's look at what our limits are. At the low end, we have the number zero. Computers start counting at zero, and that's the low end number for what we can enter here and expect results. You can put a negative number in here, but unless you do some other things we're not going into here, negative numbers aren't going to do you any good.

For the high number, you can go up to the limits of the type, if you like. In this case we're calling drawLine(int, int, int, int), so we can go up to the limits of an int, or 2147483647, and not cause a problem so far as Java is concerned. We humans like to see our results, though. There's another line of BasicPanel we need to consider. That's this one:
frame.setSize(200,200);
This is setting the size of our JFrame (creatively named "frame") to 200 pixels wide and 200 pixels high. Since the JPanel we're drawing to is inside this JFrame, we know that the highest point we're going to see is less than this. How much less varies. It's based on how wide big the window decorations are on the JFrame, and this varies by operating system, and by the user's settings. But we definitely know that anything over 200 on the high end is going to be invisible. Higher numbers won't affect Java or your computer. You won't have a line that shoots out of its window and across your desktop if you make the numbers too high. You just won't see anything outside the JPanel area on which we're drawing.

We can find out exactly how large our drawing area is by using the getClipBounds() method of the Graphics class. Feel free to experiment with it, but for now let's get back to talking about the four numbers we use with drawLine and what they do. Just saying we have a high limit of 200 on those numbers is good enough for now.

OK, so we can use numbers from 0 to somewhere short of 200 in any of those four locations and expect results.

A Pair of Pairs

The four numbers in drawLine aren't just four numbers, they're two pairs of number. The first two numbers are the first pair, the third and fourth numbers are the second pair. Each pair of numbers is a Cartesian coordinate. If you don't remember or haven't studied this in Geometry class, don't sweat it. We'll suss things out well enough here.
g.drawLine(10,10,150,150); // Draw a line from (10,10) to (150,150)
Notice how in the comment I say we're drawing a line from (10, 10) to (150, 150). Notice the first two numbers in g.drawLine() are 10 and 10, and the second two numbers are 150 and 150. This Means Something. ;)

The first pair marks the starting point for our line, the second pair marks the ending point.

The first number in each pair says how far left or right we want that point. The second number in each pair says how far up or down we want that point.

On left and right, 0 is all the way to the left. The higher the number, the farther over to the right we'll be. In our case, we can go up to 200 (almost.) A number of about 190 will probably take us all the way to the right of our drawing area.

On up and down, 0 is all the way to the top. The higher the number, the lower we'll go. A number of about 185 or so will take us all the way to the bottom of our drawing area.

If we want to draw a line all the way across our drawing area, instead of just partway across, we can replace
g.drawLine(10,10,150,150); // Draw a line from (10,10) to (150,150)
with
g.drawLine(0,0,200,200);
This will actually "go over" the edge of our drawing area, but it won't matter. Open up BasicPanel in your editor, make this change, compile it and run it.

Fine, we've mastered drawing a line from the top left to the bottom right. We're not exactly drawing starships yet, are we?

What if we change the pairs of numbers around? Open up your editor and make this change to the drawLine() statement:
g.drawLine(200,200,0,0);
Once you compile and run, what do you see? It looks the same, right? That's because we drew a line between the same two points, we just drew from bottom right to top left this time. OK, I hear you saying "Borrrringgg!" Let's move on.

Horizontal Lines

If we want a line to be horizontal, both the up-and-down numbers need to be the same. This means the second number in each pair, the second and fourth numbers. Add the following line to BasicPanel right after your other drawLine() statement:
g.drawLine(10,50,200,50);
Compile and run, and now you have a horizontal line. Notice the second and fourth numbers are the same. If you want to move the horizontal line up or down, change the number in the second and fourth position:
g.drawLine(10,20,200,20); // A higher horizontal line
g.drawLine(0,0,200,200); // A lower horizontal line
The higher the number you put in the second and fourth positions the lower the horizontal line will be. Go ahead and add these lines to your program, one at a time, and compile and run.

Vertical Lines

Now let's try vertical lines. For these, the first and third numbers (the left-right numbers) need to be the same:
g.drawLine(50,0,50,200); // A vertical line.
Change the 50s to some other number to move the vertical line left or right.

Starting and Ending

Now we can draw multiple lines to build up objects. By starting and ending the lines at the same points, we can make them meet up, and use the individual lines to build up objects. using our vertical and horizontal lines, we can make up squares and rectangles, or draw pictures that look like they're off an Etch-a-Sketch. ;)

Open up BasicPanel and replace all the existing drawLine() statements with the following:

g.drawLine(50,20,150,20); // Draw a horizontal line from (50,20) to (150,20)
g.drawLine(150,20,150,150); // Draw a vertical line from (150,20) to (150,150)
g.drawLine(150,150,20,150); // Draw a horizontal line from (150,150) to (20,150)
g.drawLine(20,150,50,20); // Draw a vertical line from (20,150) to (50,20)
Notice how the points we use match up (look at the pairs in the comments.) The last point is the same as the first to close the box.

Now, if we just wanted to draw boxes Java actually has a way to do this more efficiently. But what we're focusing on here is coordinates and how to use them.

Play around with different points and see what effect you get. Try drawing a triangle. Try drawing different sloping lines, both ones that slope down from left to right and ones that slope up. Remember, when you slope up the point on the right is going to have a second (up-down) number lower than the point on the left.

Once you play around for a while, you'll get the hang of it. If you want a larger screen area to play with, enlarge the numbers in the setSize() statement. Try this for a start:
frame.setSize(480,480);
This will give you more room to play it. Now you can take numbers up to about 480 before they go out of view. Try using getClipBounds() to find out just how large a number you can get. If you can't get it, don't sweat it, I'll cover it in a future post, or you can do an internet search to find an example in someone else's program, or jump into a Java newbie forum and ask.
StumbleUpon

Monday, July 7, 2008

Java Graphics--Start with a JFrame

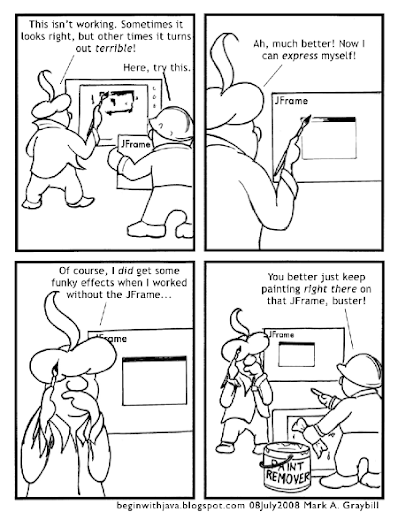
Jerry introduces Pierre to the JFrame
In A Most Basic Graphics App I presented a skeleton program that's suitable as a starting point for a graphics application. It deserves some explanation before we add more to it.

There are two graphics "components" that appear in this program, a JPanel and a JFrame. Why use both? If we want a really basic graphics app, why isn't one or the other enough?

If we're going to choose between the two, we'd have to take the JFrame. A Frame component is a special graphics component that lives on top of the host computer's graphics system. In Java it's called a "heavyweight" component. The "backboard" on which you draw, or place other components, has to be a heavyweight component. Only a heavyweight component can be guaranteed to be drawn correctly when placed directly on the user's display. Lightweight components have to be placed on top of a heavyweight component.

Since JPanel is a lightweight component, we can't use it without a heavyweight like JFrame to place it on. So if we're just picking one component, it's going to be the JFrame:

import java.awt.*;
import javax.swing.*;

public class JustaFrame extends JFrame{

public JustaFrame(){
super();
}

public void paint(Graphics g){
g.drawLine(10,10,150,150);
}

public static void main(String[] arg){
JustaFrame frame = new JustaFrame();

frame.setSize(200,200);
frame.setVisible(true);
}
}

You'll notice a problem here if you run the program. The "window decorations" for the title bar, window borders, and so on take away a piece of the space from the drawing area. Unless you've got pretty narrow title bars on your system, the line drawn by this program will start up underneath the title bar.

It's possible to find out how much space these items take up, and compensate. Or you can add another component in the visible drawing area as I did with the JPanel in the original program.

There's another difference here. The drawing is done by a paint() method, rather than a paintComponent() method. This is part of the difference between different types of components. If you change paint() into paintComponent() this program will compile and run, but it won't draw the line.

Later, we'll talk about the magic behind the paint() and paintComponent() methods and some of the other hidden mysteries of Java's graphics.
StumbleUpon